
The "Knysna Loerie"


|
|
The "Knysna Loerie"
|
|
The story behind our 16' Nice Canoe (pirogue).
Back in the early '90's our family enjoyed a holiday with friends in the Knysna forest area along the Garden Route of South Africa.
One of the days, we went with our friends and another family for a day-paddle up the Knysna river. Ever since, it has been my wish to own my own canoe.
Indigenous to this region is a bird, the Knysna Turako, or as it is more commonly called, the "Knysna Loerie". It is this bird that inspired the name of our canoe.
We have since moved to Canada, and with the vast amount of "paddleable" water, this yearning just got stronger and stronger. After web-surfing for many hours through the myriad of websites dedicated to building one's own boat, I decided to build a 16' "Stitch and Glue" pirogue.
At the beginning of summer in 2005 I purchased the plans from Bateau Boats for their "Nice Canoe 16", and got the process started. My garage was going to become a home workshop. This page journals the construction of the "Knysna Loerie", and is aimed at helping those who may be considering, or have already decided to build their own boat.
I don't profess to be an expert, either woodworker or sailor, but I built a boat. Without sites similar to this, and the many forums populated by people who have traveled this road before me, I believe I may not have had as much fun building, and the end result would not have been as river-worthy as the Knysna Loerie.
I dedicate this site to my family, those friends with whom we paddled the Knysna River, the many forum members who offered advise and support, and all those who have similar sites on the net which acted as inspiration along the way.
|
Having purchased the plans from Bateau Boats, and spent countless hours researching the process, I decided to use marine ply.( I thought, at the time, that this boat was going to be the learning experience for future builds, so did not want to spend more $$$ than absolutely necessary). In spite of suggestions that the cheapest of exterior plywood would suffice, I opted to go with marine ply, and Fir was the best price I could find at the time. |

(Click to Enlarge) |
 (Click to Enlarge) |
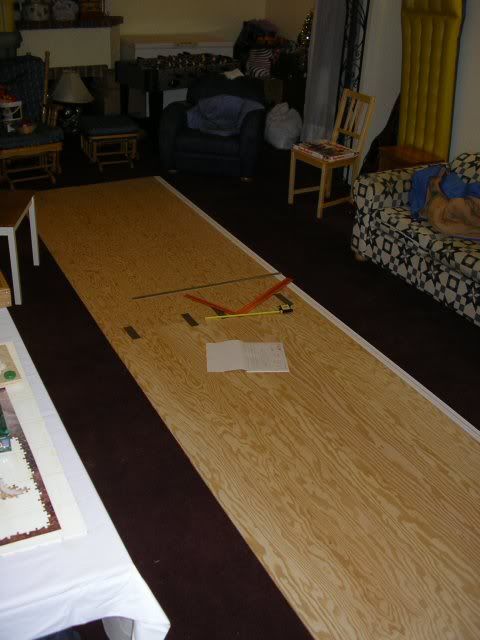
The design is such that the boat is constructed from two 8 x 4 sheets of ply. (Well, Bateau do have free plans for a 14 footer called the "Cheap Canoe" which uses 2 sheets. The NC16 actually needs 2 1/4 sheets once all the butt blocks and seat have been allowed for). I would suggest anyone using Bateau plans do purchase from them, as this allows membership to their forum, which proved to be a fountain of inspiration and advise which I sorely needed, what with this being my first experience in boat building and working with epoxy. OK, on with the show! Here I have the boards laid out and butted up against each other to get the lines drawn for cutting. These are all the tools required to get the lines onto the wood... a tape measure, square, ruler and a printed copy of the plans from Bateau. Oh, and a pencil, which is behind my ear !!! |
|
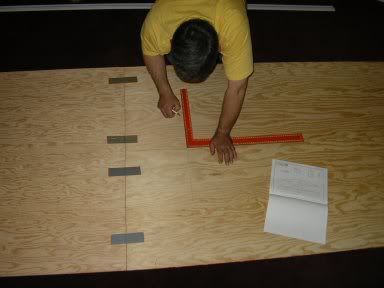
We've all heard the warning, "Measure twice, cut once". Well, when I was transferring the coordinates from the plan to the wood, I could hear my late father's words, and probably his father before him, and his before him, ad nauseum. This is sound advise, as a little error at this point could evolve into a big, and maybe, costly error later. This process, which took me about 1 1/2 hours, played havoc with my knees and back. The Bateau plans certainly were clear and precise in what needed to be done. |
(Click to Enlarge) |

(Click to Enlarge) |
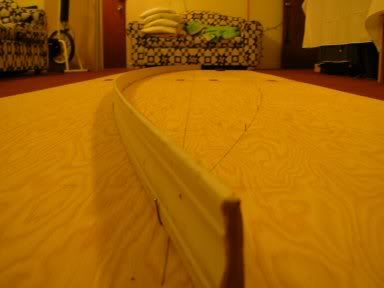
Once all the plotting was completed (and checked, and checked again) I knocked finishing nails into all the points. |
| A 16' baseboard did the job of 'joining the dots' to create the smooth curve needed to mark the cutting lines. Any long, flexible straightedge would work, conduit, wood strip, etc. |
(Click to Enlarge) |
(Click to Enlarge) |
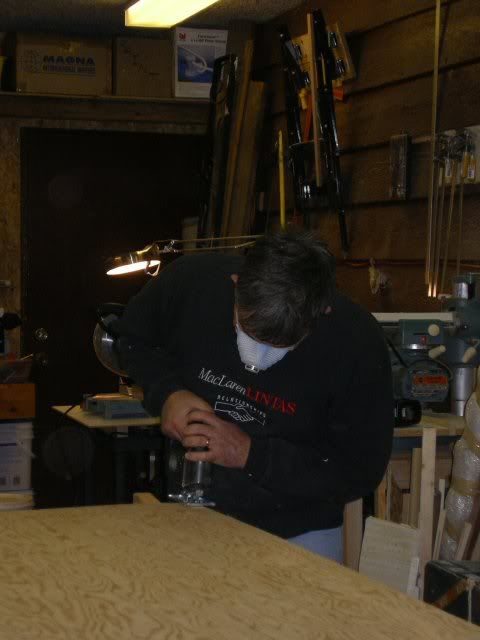
At last, after working on the floor for a little over 'too long', I moved into the garage, which was to be my home for the next 6 weeks or so. Not that I was there 24/7, but I did sneak in as often as my other domestic duties would allow. In order to cut as close and smoothly along the lines as possible, it is suggested to use a circular saw. Since I do not own a portable hand held saw (yet), I used my jig saw, and managed to cut close enough to the lines to stay within the generous tolerances allowed with the "stitch and glue" method of construction. |
| With all the cutting finished, I re-assembled the pieces to see the best grain pattern. Not much choice, but I wanted to keep the inside unpainted, so needed to have the board orientated correctly. This is the "outside up", and I then butted the front and back together and connected with duct tape. |

(Click to Enlarge) |

(Click to Enlarge) |
I flipped the taped pieces over, and not visible in the photo (because it's underneath) is a length of duct tape running the width of all of them. This will act as a hinge a little later. |
|
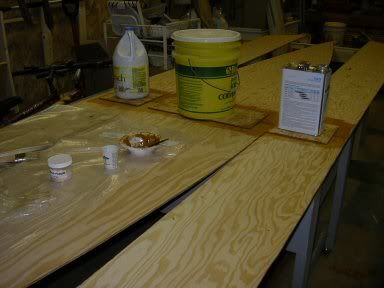
My First Encounter With Epoxy. In hindsight, this was no big deal, but I was pretty anxious about working with epoxy for the first time. The butt blocks needed to be fitted. An epoxy glue is mixed using epoxy resin and wood flour. There are countless sites and forums dedicated to the use of epoxy. Again I spent hours surfing the net, and eventually, suffering from information-overload, Just Did It !!! |

(Click to Enlarge) |
(Click to Enlarge) |
Well, with all the different opinions on 'how to' and 'when to' and sometimes even 'why to' I was surprised at how easy the process actually is. The panels and butt blocks are first coated with a layer of plain epoxy, and then the wood flour glue mixture is applied. The glue needs to be the consistency of ketchup. Again checking on alignment and grain etc. the blocks are waited down and left to cure. This should be left overnight, but the recommendation is 24 hours. I found the blocks tended to slide around on the glue, so had to check the positioning regularly until the epoxy gelled enough to stay in one place... where I wanted them. |
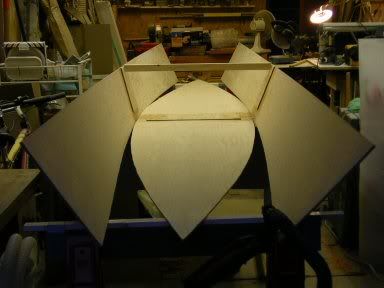
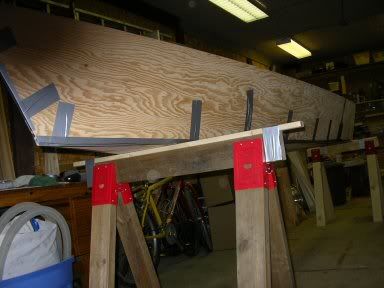
| Once set, a cross piece is fitted and the "hinge" brought into play. The sides are folded up and I put screws through, into the cross piece. I small point, but cut the ends of the cross piece at the angle of the side panel. Later on, there is a lot of pressure at this point, and square ends dent the panel. Go on, ask me how I know !! |
(Click to Enlarge) |
(Click to Enlarge) |
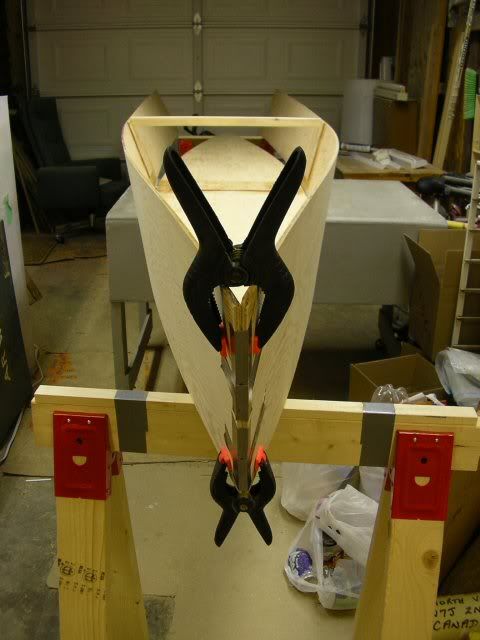
The stems are then brought together and clamped in place. (This was when I realized the cross piece needed to be at the angle). In traditional Stitch and Glue, holes are drilled along the edges of the panels and they are "stitched" together with copper wire or electric cable ties. Since there is not a lot of tension in the Nice Canoe construction, I went with the suggestion that duct tape will work just as well. |
| I tacked the panels together with the tape until I was happy that all the pieces were in the right place. Here, it's a good practice to rotate from quarter to quarter. Starting in the middle, tape left front, right front, left back, right back, left front, right front... you get the picture? This will ensure the panels line up as true and symmetrical as possible, or at least as good as your cutting allows. |
(Click to Enlarge) |
(Click to Enlarge) |
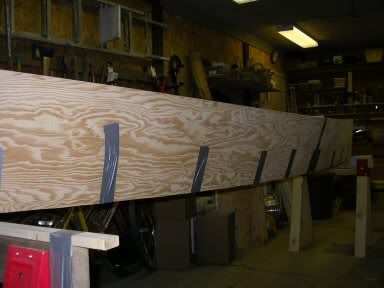
When all the tacking is done, the joints were closed off with duct tape. This, while holding the panels together, also prevents epoxy glue from oozing out during the filleting process to follow. |
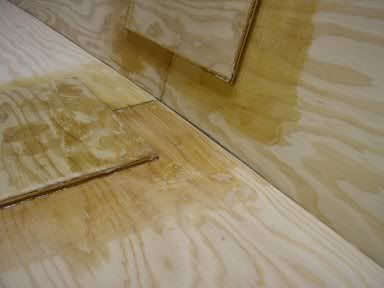
| Take care when taping on the hinge, to make it as tight as possible. With Stitch and Glue, one wants a small gap between panels, but only about 10mm max they say, (still trying to figure out who they are, but anyhow). I misjudged the stretch of the duct tape, and was presented with this gap amidships. It is not recommended to have wood butting up against wood. It's the epoxy and glass tape which gives the boat strength and reinforcement, and wood against wood does not allow flexibility, and causes stress points at the joins. |

(Click to Enlarge) |

(Click to Enlarge) |
The beauty of building your own boat, and from wood to boot, is that there are guidelines, albeit, but no rules per se. Problems are easy to solve, and I needed my strap clamp, a bit more tape... |
| ... and voila! My side joints were fixed. |
(Click to Enlarge) |